Creating a New Report
To create a new report
-
Go to File > New > Jasper Report or click
 on the main toolbar.
The New Report Wizard window displays the Report Templates page. Jaspersoft Studio includes a number of pre-installed templates; you can also create your own. See Chapter 1, “Report Templates,” on page 1 for more information.
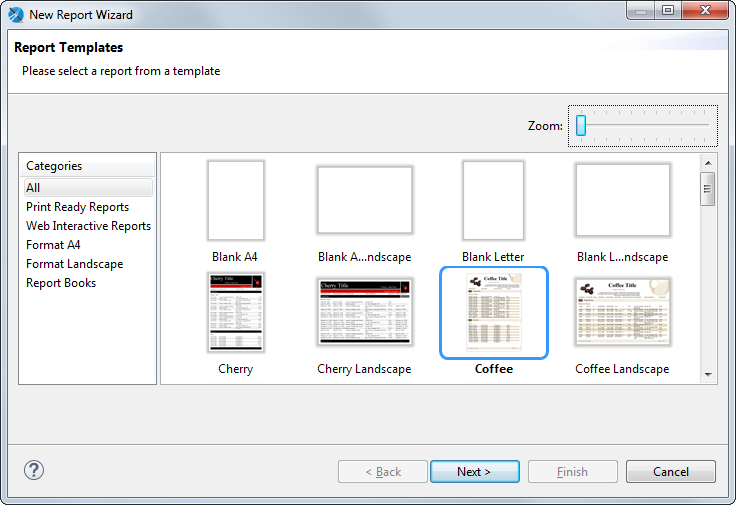
Figure 1 New Report Wizard -
Select the Coffee template and click Next. The New Report Wizard shows the Report file page.
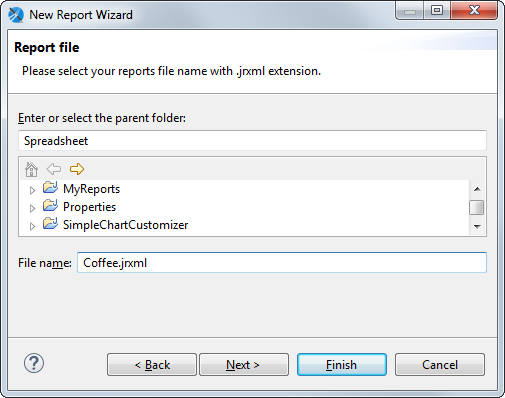
Figure 2 New Report Wizard > Report file -
Navigate to the folder to which you want the save report and name the report. To create a folder, see Creating a Project Folder.
-
Click Next.
The New Report Wizard displays the Data Source page. This is where you choose the data that fills the report. The dropdown menu shows the pre-installed data adapters as well any data adapters you have added. The following adapters are pre-installed:
-
One Empty Record - Empty rows: Data adapter that lets you create a report without data. You might use this option to define the layout of a report and connect it to a data source later.
-
Sample DB - Database JDBC Connection: Data adapter that connects to an SQL database provided with the Jaspersoft Studio installation. If you are getting your data from a JDBC database, you must also supply an SQL query.
Note
You can create a data adapter separately or click New... to create a data adapter directly from this dialog. Adapters can be created globally (embedded in the workspace) or local to a specific project. Using a local adapter makes it easier to deploy the report to JasperReports Server. See Working with Data Adapters for more information.
-
Choose Sample DB - Database JDBC Connection. With a JDBC connection, the Data Source dialog shows the database schema on the left and your query on the right.
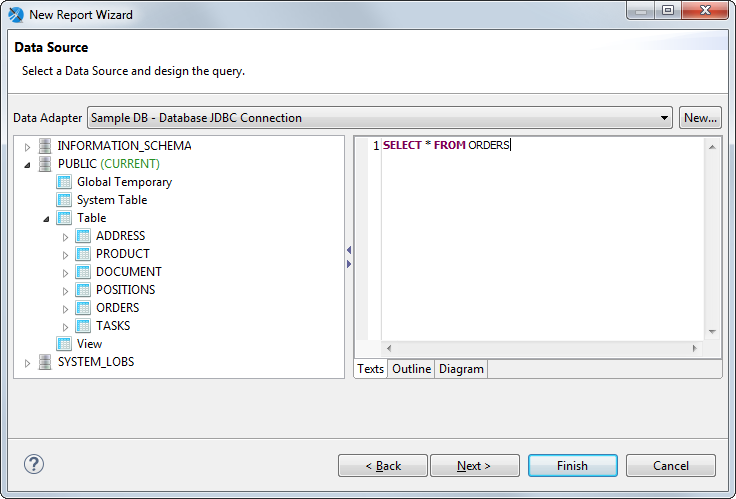
Figure 3 New Report Wizard > Data Source -
Enter the query
SELECT * FROM ORDERSon the right. Note that you can view your query in three different ways: as text, as an outline, or as a diagram. -
Click Next. The Fields window is displayed. The Dataset list shows all the discovered fields.
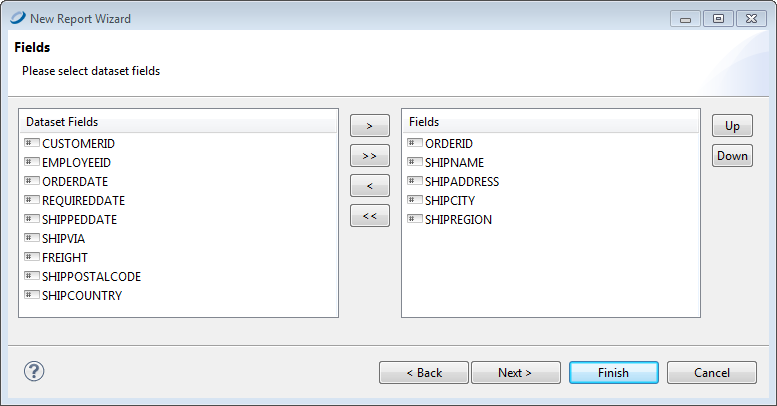
Figure 4 New Report Wizard > Fields -
Select the following fields and click the right arrow to add them to your report.
-
-
ORDERID
-
SHIPNAME
-
SHIPADDRESS
-
SHIPCITY
-
SHIPREGION
-
-
Click Next. The Grouping window is displayed. You do not want any grouping for this report.
- Click Next and Finish.
Jaspersoft Studio now builds the report layout with the selected fields included as shown.
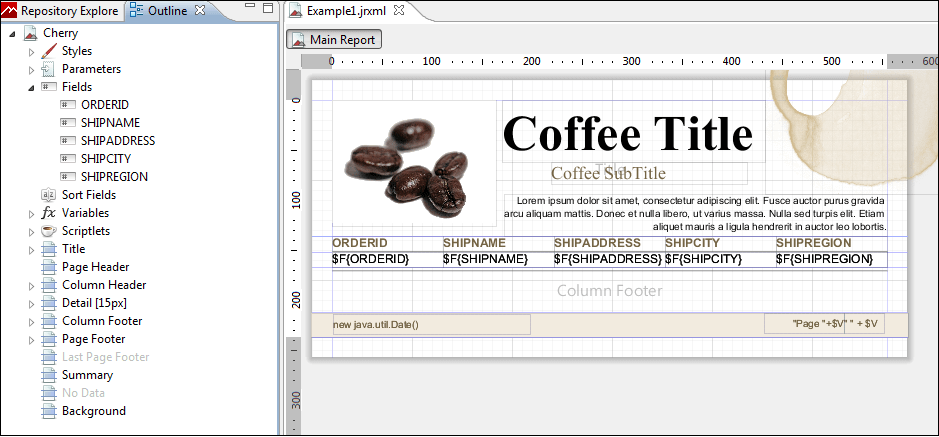 |
| Figure 5 New Report in the Design Tab |