Modifying the Query When Uploading a Report
The query in the report unit determines the data that the server retrieves from a data source. You can create multiple reports that look the same but contain different data by defining different queries for the same JRXML file each time you upload it. You can choose to use a stored query in the repository or define a new one. This example uses a query that returns accounts from a single country.
You can only override the main query for a report (specifically, the query defined directly within the JRXML root element <jasperReport>). If the report has elements that use a sub-dataset (including all table elements and all elements that use a different dataset), then the queries for these elements is not be affected.
First you need to upload the report and select a data source, as in the previous example. Then you can create a query that replaces the original query in the report.
To locate the sample report for this example
-
Log in to the server as an administrator and select View > Repository.
-
Locate the folder where you want to add the report. For example, go to Public > Samples > Reports.
-
Right-click the Reports folder and select Add Resource > JasperReport from the context menu. The Set Up the Report page of the JasperReport wizard appears.
Note
Add Resource appears on the context menu only if you have write permission to the folder.
-
In Naming, enter the name and description of the new report and accept the generated Resource ID:
- Name - Display the name of the report:
Sample Query Report. - Resource ID - Permanent designation of the report object in the repository:
Sample_Query_Report. - Description - Optional description displayed in the repository:
Example of changing a query in a report.
- Name - Display the name of the report:
-
Select Upload a Local File and Browse to <js-install>/samples/reports/SimpleReport.jrxml.
-
Click Open to upload the file.
To select a data source for the report
- In the Add JasperReport wizard, click Data Source. The Link a Data Source to the Report page appears.
- Choose Select data source from the Repository and Browse to Public > Samples > Data sources > JServer JNDI Data Source.
- Click Select. The path to the data source appears on the page.
To define a custom query for the simple report example
-
In the Add JasperReport wizard, click Query. The Locate Query page presents the following choices:
-
Do not link a Query - Select this option to use the existing query already defined within the main JRXML.
-
Click here to create a new Query - Guides you through defining a new query for this report only.
-
Select a Query from the Repository - Select this option to use a saved query from the repository.
Note
The SimpleReport.jrxml file already contains a query. Choosing the second or third option overrides the existing query by defining a new one.
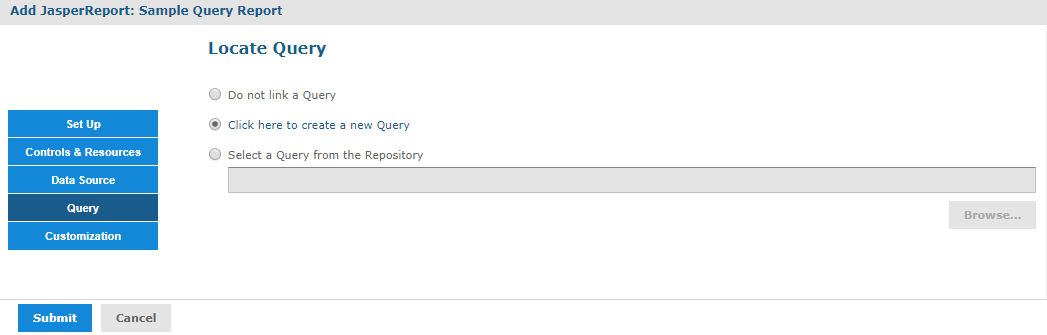
Figure 1 Query Page
-
-
Select Click here to create a new Query. The link becomes active.
-
Click the link, Click here to create a new Query. The Add Query wizard appears and displays the Name the Query page.
-
Enter the name, resource ID, and description of the query. The query in this example retrieves only Mexican accounts. Enter the following values:
- Name -
MexicoAccounts - Resource ID -
MexicoAccounts - Description -
Query for example in User Guide
This query and its properties are visible only within the report unit.
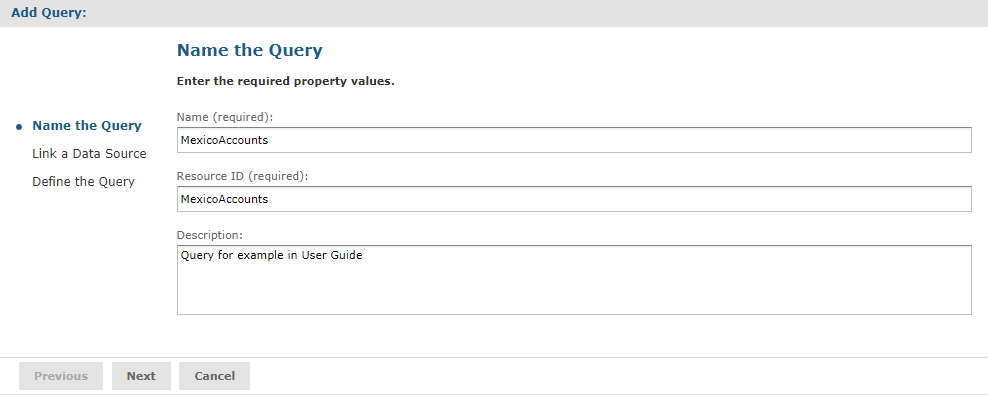
Figure 2 Name the Query Page
- Name -
-
Click Next. The Link a Data Source to the Query page appears. Here you have the option to select a data source to use only with this query. This can be different from the data source you selected for uploading the report. You can choose an existing data source from the repository, define a new one, or select not to link a data source.
-
Select Do not link a data source to use the same data source you already selected.
-
Click Next. The Define the Query page appears.
-
Select SQL in the Query Language dropdown and enter the following query string to retrieve only Mexican accounts:
SELECT * FROM accounts WHERE billing_address_country = 'Mexico' ORDER BY billing_address_city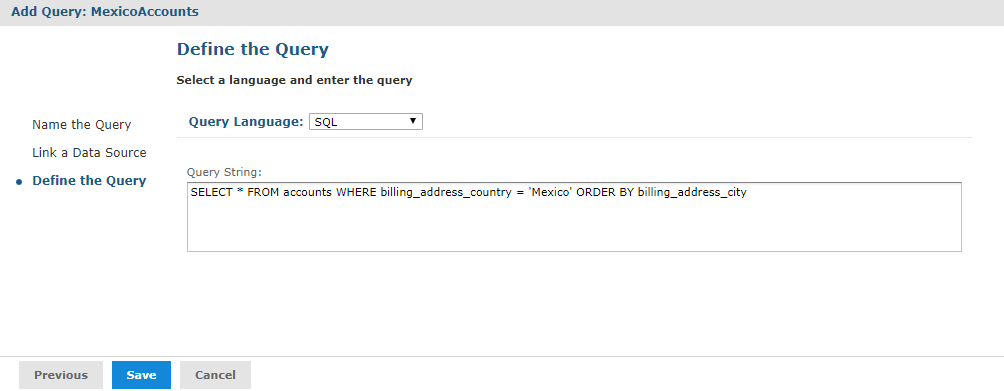
Figure 3 Definition of a Query
-
Click Save to save the query. The Customization page appears. No customization is required for the example.
-
Click Submit to submit the new report unit to the repository.
To run the report
Locate the report in the repository and click to run it. Only accounts in Mexico are shown in the report.
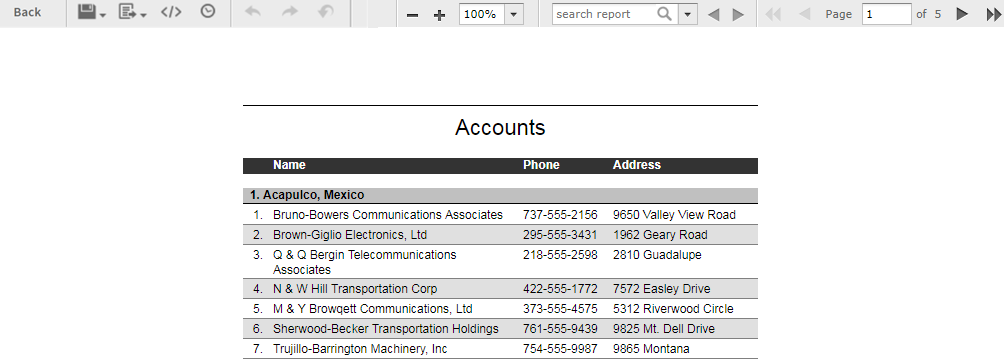
Figure 4 Output of the Report