Enabling Java Naming and Directory Interface (JNDI) Security
Enabling JNDI security or restricted access provides access-control to data sources. With JNDI restricted access, read-only access is provided to data sources.
This chapter includes the following sections:
Additional Buildomatic Configuration for JNDI Security Upgrade
The default_master.properties file handles the configuration for the JNDI security upgrade.
To configure the default_master.properties file for the JNDI security upgrade:
- Edit the
default_master.propertiesfile to configure settings specific to your database and application server.
Look for the line Disable Edit/Delete access to jasperserver and jasperserverAudit JNDI connections and uncomment the settings listed in Sample Values for the default_master.properties File for JNDI Restricted Access Installation.
For example: To uncomment #jndi.restrictedAccess=true, change it to jndi.restrictedAccess=true.
Sample Values for the default_master.properties File for JNDI Restricted Access Installation lists the settings that you need to uncomment with sample values for each supported database.
Sample Values for the default_master.properties File for JNDI Restricted Access Installation
Database |
Sample Property Values |
|---|---|
PostgreSQL |
# jndi.restrictedAccess=true
|
MySQL |
# jndi.restrictedAccess=true
|
Oracle |
# jndi.restrictedAccess=true
|
DB2 |
|
SQL Server |
**Note** The password for SQL Server must be a combination of a special character, a number, an uppercase, and a lower case character. |
**Note** Once the database is created, you must create read-only users. For details, refer to [Create Read-only Users](#create-read-only-users) |
|
Each sample_conf/<dbType>_master.properties file contains the properties and appropriate sample values.
You can enable JNDI restricted access while deploying JasperReports Server on Tomcat or JBoss EAP or WildFly. For details, refer to the JasperReports® Server Security Guide.
Create Read-only Users
The following table lists the database and the steps to create read-only users:
Database |
Steps to create read-only users |
|---|---|
PostgreSQL |
Create user:
Assign read-only permissions:
**Note** The above steps are for the jasperserver database. If you use split installation follow the same steps for the jsaudit database too. |
MySQL |
Create user:
Or
|
Oracle |
Create user:
Assign read-only permissions:
|
DB2 |
Create user:
Assign read-only permissions: login using db2inst1/password #Connect to the database
# Create the 'read-only' role if it does not exist
# Retrieve the list of table names in the 'JSPRSRVR' schema and save them to a file
# Grant 'SELECT' privilege for each table in the 'read-only' role
# Grant the 'read-only' role to the 'jasperserver' user
# Clean up - remove the temporary file
|
SQL Server |
Create user:
Assign read-only permissions:
|
Websphere Installation for Enabling JNDI Security
-
Deploy the VM on the Websphere application server.
-
Log in to the Websphere console
https://<ip_address>:9043/ibm/console, using the credentialswasadminandwasadmin. -
Navigate to Resources > JDBC > Data Sources > Add New JNDI Data Sources. For details, refer to Configuring a JDBC Provider in WebSphere.
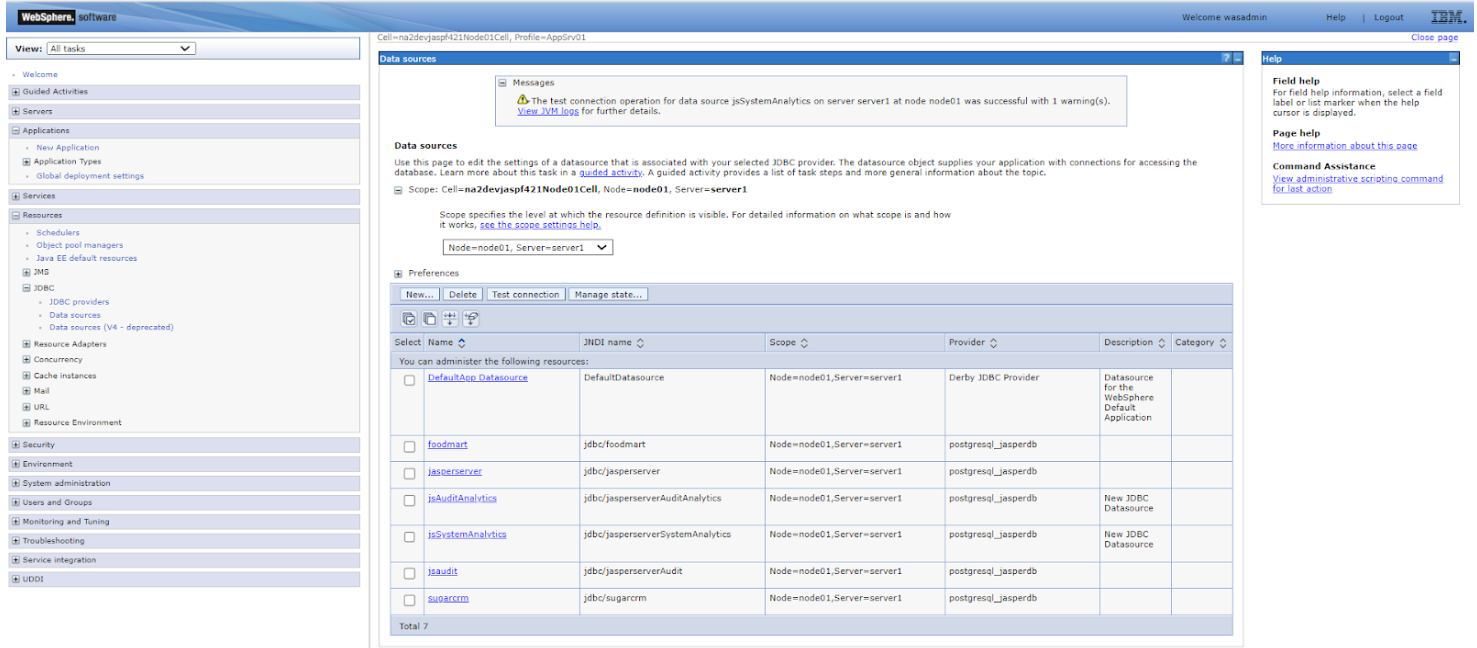
Figure 1 Add New JNDI Data Sources -
Restart the Websphere server.
-
Navigate to Applications > Application Types > Websphere Enterprise Application > Select your application (for example,
jasperserver-pro_war) > Stop > Start.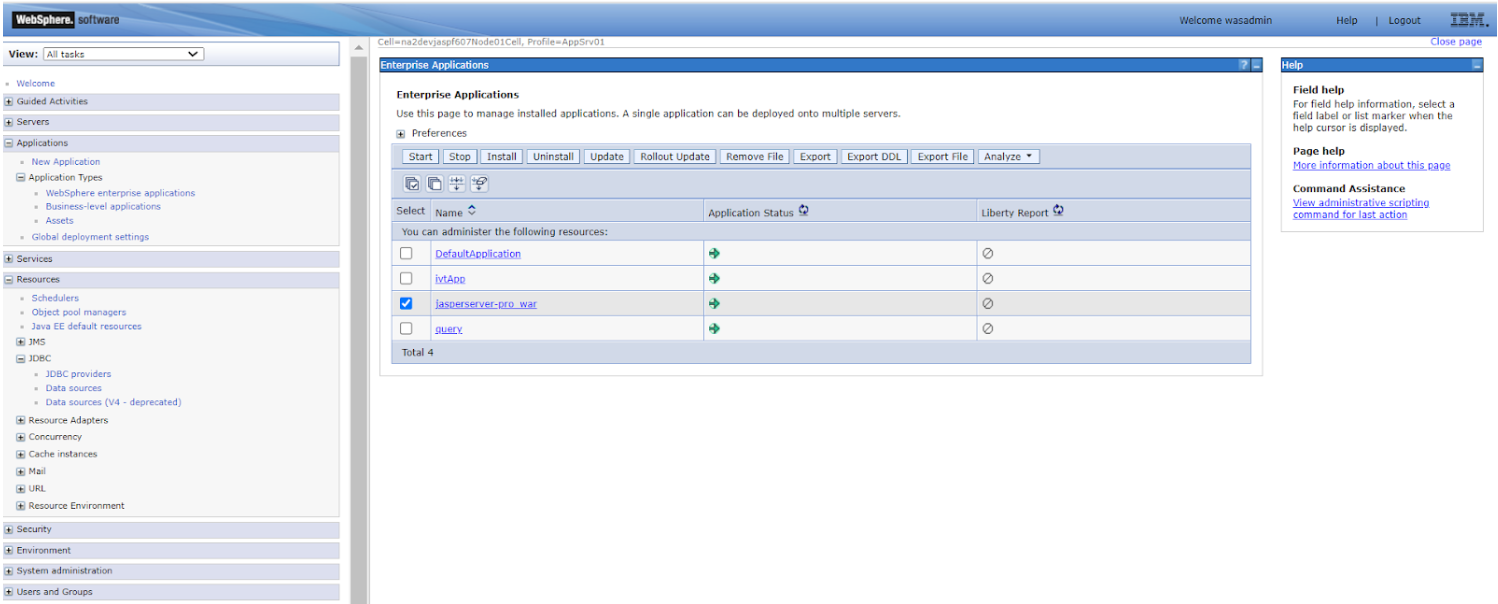
Figure 2 Restart Websphere Server -
Log in to JasperReports Server and check the connection to all JNDI data sources.
-
Set
hibernate.propeties=true. -
Set
metadata.hibernate.jndi.restrictedAccess.enabled=true. -
Restart the application server again and go to JasperReports Server. The test connection should fail for
jasperserverandjasperserverAuditdata sources.
Weblogic Installation for JNDI Security
-
Deploy the VM on the Weblogic application server.
-
Log in to the Weblogic console
http://host:port/consoleusing the credentialsweblogicandjust4eng. -
If the console is not accessible, then start Weblogic by using the following commands:
sudo chmod -R 777 Oraclecd /opt/Oracle/Middleware/Oracle_Home/domains/jasper_domain/binsudo ./startWebLogic.sh -
Navigate to Domain Structure> Services> Data Sources>Add AuditAnalyticsDataBase and JasperServerSystemDataBase. For details, refer to Procedure for Installing the WAR File for WebLogic.
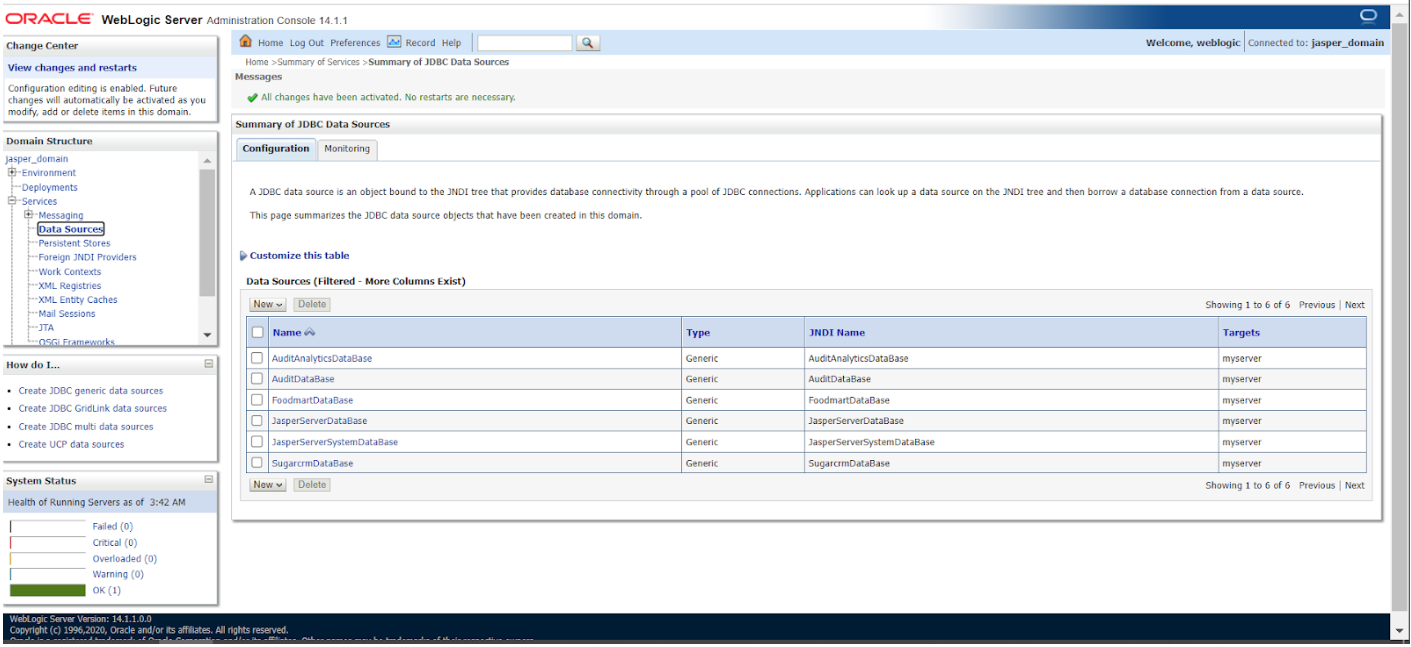
Figure 3 Add New JNDI Data Sources -
Redeploy WAR file.
-
Navigate to Deployment.
-
Select
jasperserver-profile and click Update.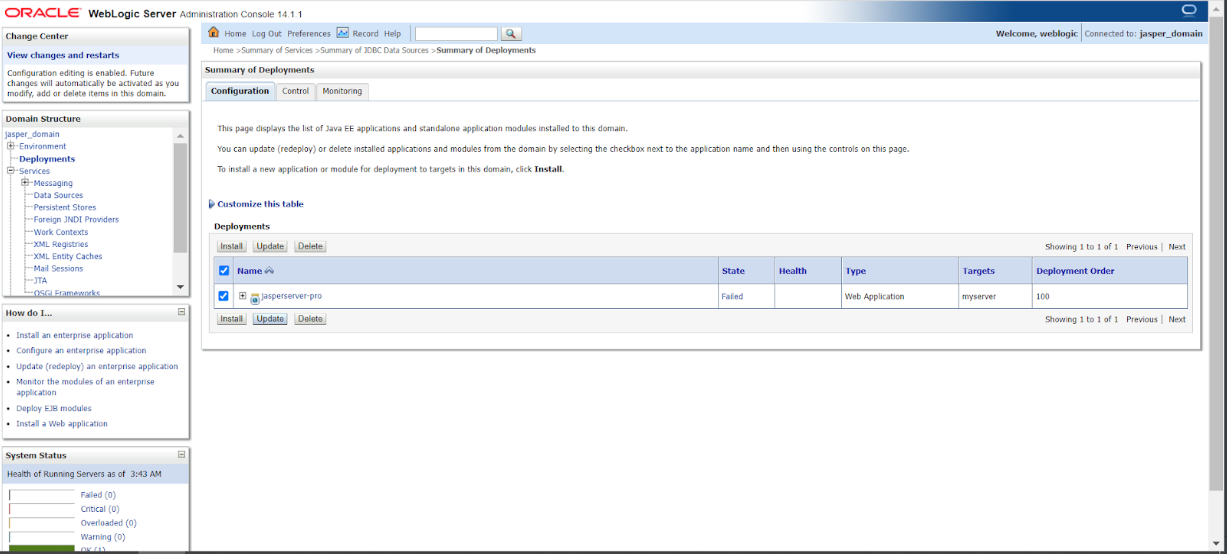
Figure 4 Redeploy WAR file -
Log in to JasperReports Server and check the connection to all JNDI data sources.
-
Set
metadata.hibernate.jndi.restrictedAccess.enabled=true. -
Update the
hibernate.propertiesinjasperserver-pro.warfile. -
Redeploy the
jasperserver-pro.warfile. -
Go to JasperReports Server. The test connection should fail for
jasperserverandjasperserverAuditdata sources.
Enabling JNDI Security post Installing JasperReports Server
-
Follow the steps in Create Read-only Users to create read-only users.
-
Update the
jasperreports server>/WEB-INF/hibernate.propertiesfile and setmetadata.hibernate.jndi.restrictedAccess.enabled=true. -
Edit the
jasperreports server>/META-INF/context.xmlfile.Based on the values used in Step 1, change the username and password for the following two resources:
-
jdbc/jasperserverSystemAnalytics -
jdbc/jasperserverAuditAnalytics
-
-
Complete the changes and restart the application server.
-
Create a JNDI data source by using either of the following two connections:
-
jdbc/jasperserver -
jdbc/jasperserverAudit
A message stating
If your JNDI Data Connection has Edit/Delete access disabled, jasperserver and jasperserverAudit cannot be used for creating a new data source. Please select another JNDI connection.is displayed. -
-
Create a JNDI data source by using either of the following two connections:
-
jdbc/jasperserverSystemAnalytics -
jdbc/jasperserverAuditAnalytics
You should be able to create data source using these connections.
-