Adding an Item to the Main Menu
Adding menu items involves three files:
- The actionModel file for the menu item.
- The properties file that labels the menu item.
- An action file that handles events for the menu item.
This example adds a special menu item so that MyCompany employees can easily find their accounts reports.
-
Edit the file
<js-webapp>/WEB-INF/actionModel-navigation.xml. Locate the actionModel for the View menu near the beginning of the file.<!--context for view option on primary menu--> <context name="main_view_mutton" test="!banUserRole"> <selectAction labelKey="menu.repository"> <option labelKey="menu.search" action="primaryNavModule.navigationOption" actionArgs="search"/> ... <separator/> <option labelKey="NAV_028_ACCOUNTS" action="primaryNavModule.navigationOption" actionArgs="accounts"/> </selectAction> </context> ... -
Add a
separatortag and anoptiontag for the menu item. Theoptiontag has attributes to specify the label key and the name of the action to perform. -
Open one of these files. The name of the properties file depends on your edition of JasperReports Server:
Commercial Editions:
<js-webapp>/WEB-INF/bundles/pro_nav_messages.propertiesCommunity Project:
<js-webapp>/WEB-INF/bundles/jasperserver_messages.propertiesThe names of the keys are slightly different depending on the file. The following example is based on the contents of the commercial edition
pro_nav_messages.properties. -
Add the line for the
NAV_028_ACCOUNTSproperty with an appropriate value, in this caseMyCompany Accounts. -
If you support multiple locales, add the same message key to the other language bundles.
-
Create a working directory where you can edit and build JavaScript source code, as described in Customizing JavaScript Source Code.
-
Edit your working copy of the file
jasperserver-ui/ce/jrs-ui/src/actionModel/actionModel.
primaryNavigation.js.var primaryNavModule = { NAVIGATION_MENU_CLASS : "menu vertical dropDown", ACTION_MODEL_TAG : "navigationActionModel", CONTEXT_POSTFIX : "_mutton", NAVIGATION_MUTTON_DOM_ID : "navigation_mutton", NAVIGATION_MENU_PARENT_DOM_ID : "navigationOptions", JSON : null, /** * Navigation paths used in the navigation menu */ navigationPaths : { library : {url : "flow.html", params : "_flowId=searchFlow"}, home : {url : "home.html"}, logOut : {url : "exituser.html"}, search : {url : "flow.html", params : "_flowId=searchFlow&mode=search"}, report : {url : "flow.html", params : "_flowId=searchFlow&mode=search& filterId=resourceTypeFilter&filterOption=resourceTypeFilter-reports&searchText="}, accounts : {url : "flow.html", params : "_flowId=searchFlow&mode=search& filterId=resourceTypeFilter&filterOption=resourceTypeFilter-reports&searchText=account"}, ...Warning
Because of space limitations, the line is shown broken across two lines. In your application, make sure it's on a single line.
-
Add a URL and parameters to load the target page of the new accounts menu item. In this example, the action is to perform a search for all reports with the word
accountin their name or description. -
Build the JavaScript source code in your working directory and copy the output back to JasperReports Server as described in 1.0.1, “Customizing JavaScript Files,” on page 1.
-
Save the modified files and reload the web app in the app server to see the changes (see 1.0.1, “Reloading the JasperReports Server Web App,” on page 1).
-
When the web app has reloaded, log into JasperReports Server as
joeuser. You'll see the View > MyCompany Accounts menu item was created and, when you select it, it performs a customized search. The following figure shows both the menu item and the search results on the same page.
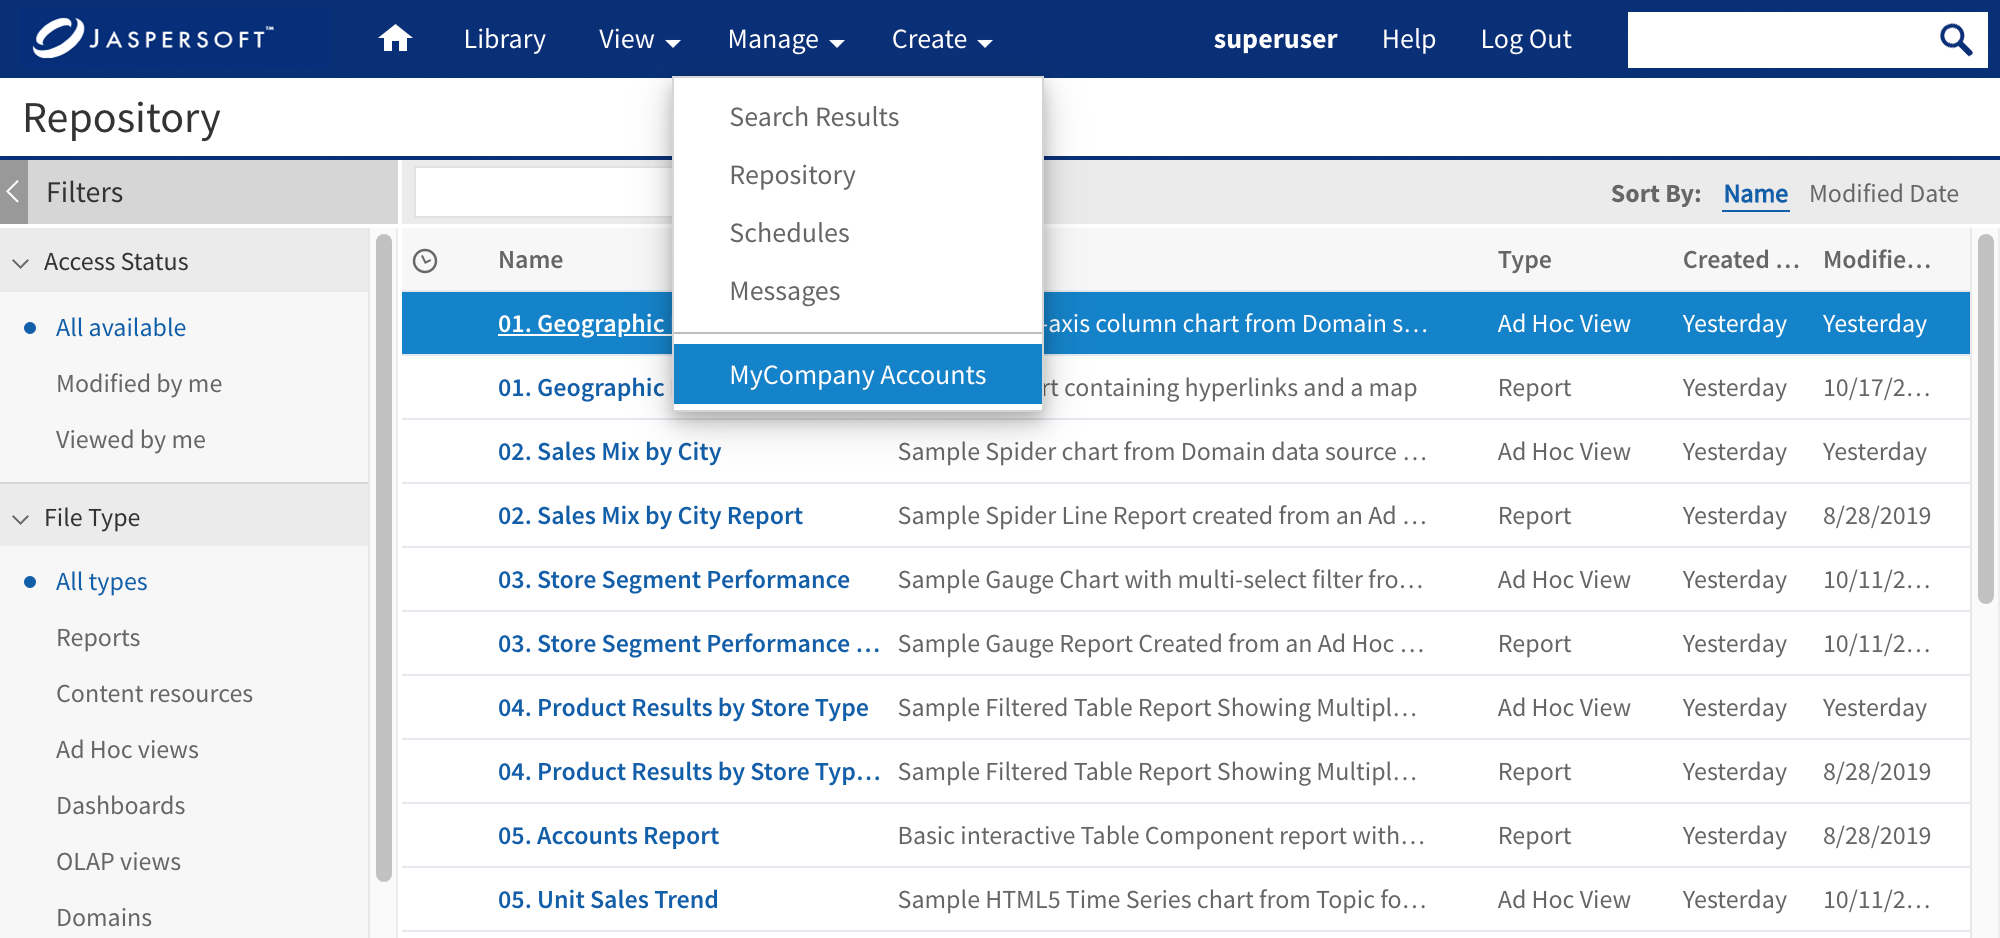
Figure 1 Custom Menu Items and Corresponding Action