Creating the Report Book Framework
The first step is to create your report book jrxml. This is the framework in which you organize the book’s parts.
To create the report book framework
-
In Jaspersoft Studio, click
 and select Other... to open the Wizard Selection window.
 -
Expand the Jaspersoft Studio folder, select Jasper Report, and click Next.
-
In the Categories panel, select Report Books.
-
Click to select Wave Book then click Next.
-
In the Project Explorer, select the My Reports folder, change the file name to
Sample_Book.jrxml, and click Next. -
In the Data Source window, select a data adapter. For our walkthrough, use Sample DB – Database JDBC Connection.
-
In the text panel, enter the following query then click Next:
select distinct shipcountry from orders order by shipcountry -
In the Fields window, move SHIPCOUNTRY from the Dataset Fields panel to the Fields panel and click Next.
-
In the Book Sections window, make sure that all three options are selected:
-
Create Cover Section
-
Create Table of Contents
-
Create Back Cover Section
- Click Finish.
Your Report Book project opens in Jaspersoft Studio.
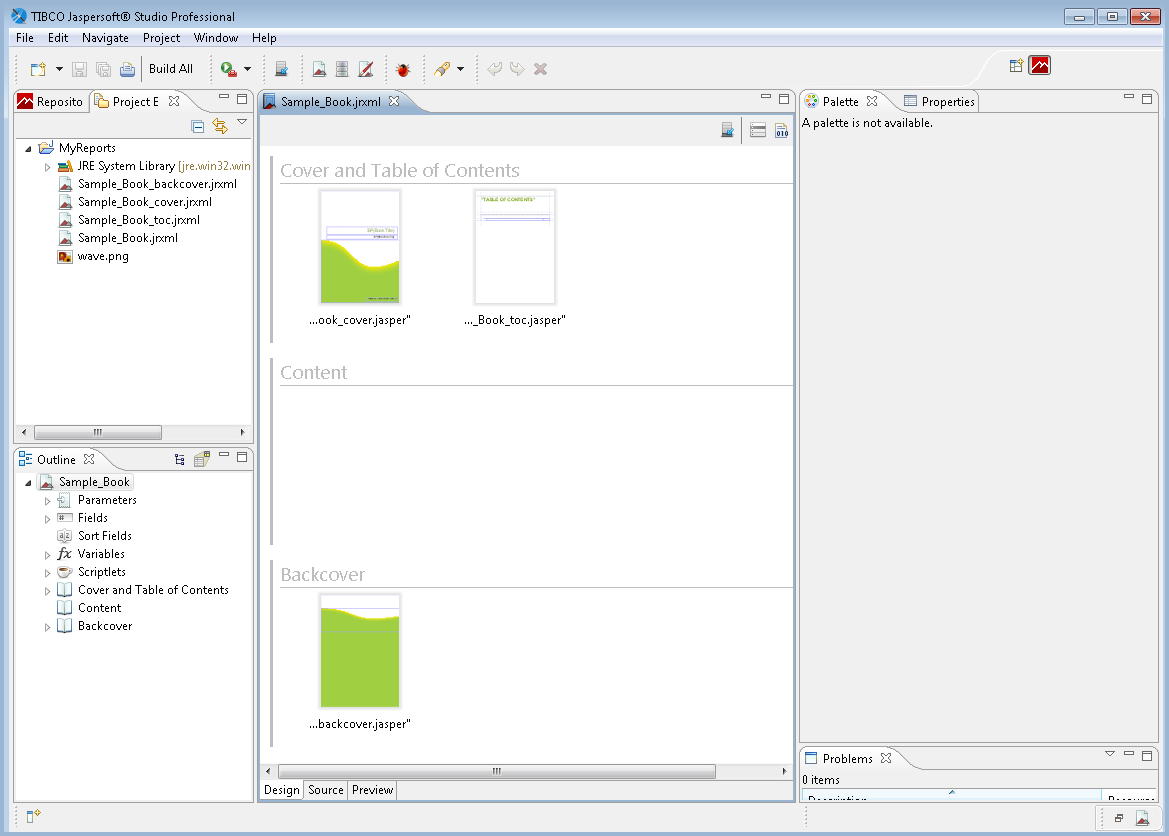
Figure 1 Report Book Framework In Jaspersoft Studio, open the Project Explorer and expand the My Reports folder. There, you can see the jrxml files you just created:
-
-
Sample_Book_backcover.jrxml
-
Sample_Book_cover.jrxml
-
Sample_Book_toc.jrxml
-
Sample_Book.jrxml
Sample_Book.jrxml is open in the main Design tab. This is the file in which you organize the report parts. You notice three groups for the book part types:
-
Cover and Table of Contents contains Sample_Book_cover.jrxml and Sample_Book_toc.jrxml.
-
Content is empty.
-
Backcover contains Sample_Book_backcover.jrxml
When you select each these book parts in the design window, you can view and edit their properties in the Properties View, as you can with standard reports and subreports.
Next, you create a subreport and add it to your report book.